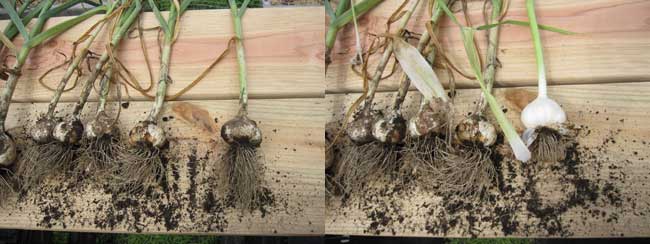
Figuring out when to harvest homegrown garlic isn't easy, especially for beginning gardeners. Most books say to harvest garlic when 30% of the foliage turns brown or when there are five or six green leaves left on the stalk but that advice seemed a bit arbitrary, so for our first harvest, we simply took our cue from the garlic. The garlic was planted at the end of October (Zone 5) and by the end of July the garlic stems started turning brown, but were nowhere near the 30% mark - it was more like 20%. It's hard to tell by the photo below, but one day the plants started to kind of lean over, and when they hadn't straightened up within a few days it seemed like a good time to start the harvest. We dug up two or three bulbs as a test and they looked good, so we harvested the rest of the bulbs. All the bulbs were healthy and decent size.

Although the Internet offers information about how to harvest garlic, we relied on two of our books for advice on harvesting garlic. One of the books is Sustainable Market Farming by Pam Dawling and the other is The Market Gardener by Jean-Martin Fortier, both available on Amazon. We followed Mr. Fortier's book for harvesting the garlic, and used Ms. Dawling's book as a basis for designing the garlic drying rack.

The garlic needs a fairly light hand when being harvested. With our sandy soil, a trowel is all that's needed to gently ease the garlic roots out of the soil. Fortier suggests letting the bulbs dry in the sun on a piece of "black geotextile" (which I'm guessing is landscape fabric in Canadian-speak), then trimming the roots off the bulbs. There were a surprising number of earthworms in the garlic roots so the bulbs were left in the raised bed for a few hours in order to let the earthworms drop back into the soil, which they could not have done if the bulbs were on a piece of fabric. Once the worms had time to get back home the garlic was moved to the edge of the raised bed for several hours, then onto a patio table.

Both books suggest using fans to continue the drying process, but the authors are growing garlic on a commercial basis and we simply don't have the space or resources to set up a fan to dry the garlic, so a homemade drying rack was used instead. After spreading the newly-harvested garlic on a patio table for a few days, the garlic was moved to the drying rack. The drying rack is working well and when I get some time I'll show how the rack was made. There's a video that shows our garlic drying rack towards the end of the video in the Growing Garlic post.
Before putting the garlic in the drying rack the outer layer of skin was removed as per Fortier's suggestion. The roots were also trimmed as suggested, but not as short as they would to be when stored. It's been two months since the garlic was harvested and it's drying very well.
The initial cost for the seed garlic was $23.70 which returned 72 bulbs about 2" or more across, 18 bulbs between 1"-2", along with another dozen or so bulbs that were scallion-sized. Three of the largest bulbs are being kept for next year's garlic planting. Dividing the $23.70 cost by the 72 large bulbs comes out to $0.329166 per garlic bulb, which is cheaper than the same sized garlic bulb at the supermarket or farmer's market and our garlic is homegrown and organic, while the store bought garlic is not.